Agentic Kanban Board
This tutorial aims to guide you through the Agentic Kanban Board interface, a tool designed for creating and visualize multi-agent AI systems.
Why a Kanban Board?
Kanban boards are excellent tools for showcasing team workflows in real time, providing a clear and interactive snapshot of each member's progress. We’ve adapted this concept for AI agents. Now, you can visualize the workflow of your AI agents as team members, with tasks moving from "To Do" to "Done" right before your eyes. This visual representation simplifies understanding and managing complex AI operations, making it accessible to anyone, anywhere.
Try It Live!
Experience the Agentic Kanban Board here.
Interface Overview
The Agentic Kanban Board is divided into 3 sections:
- Team Setup
- Task Board
- Results Overview
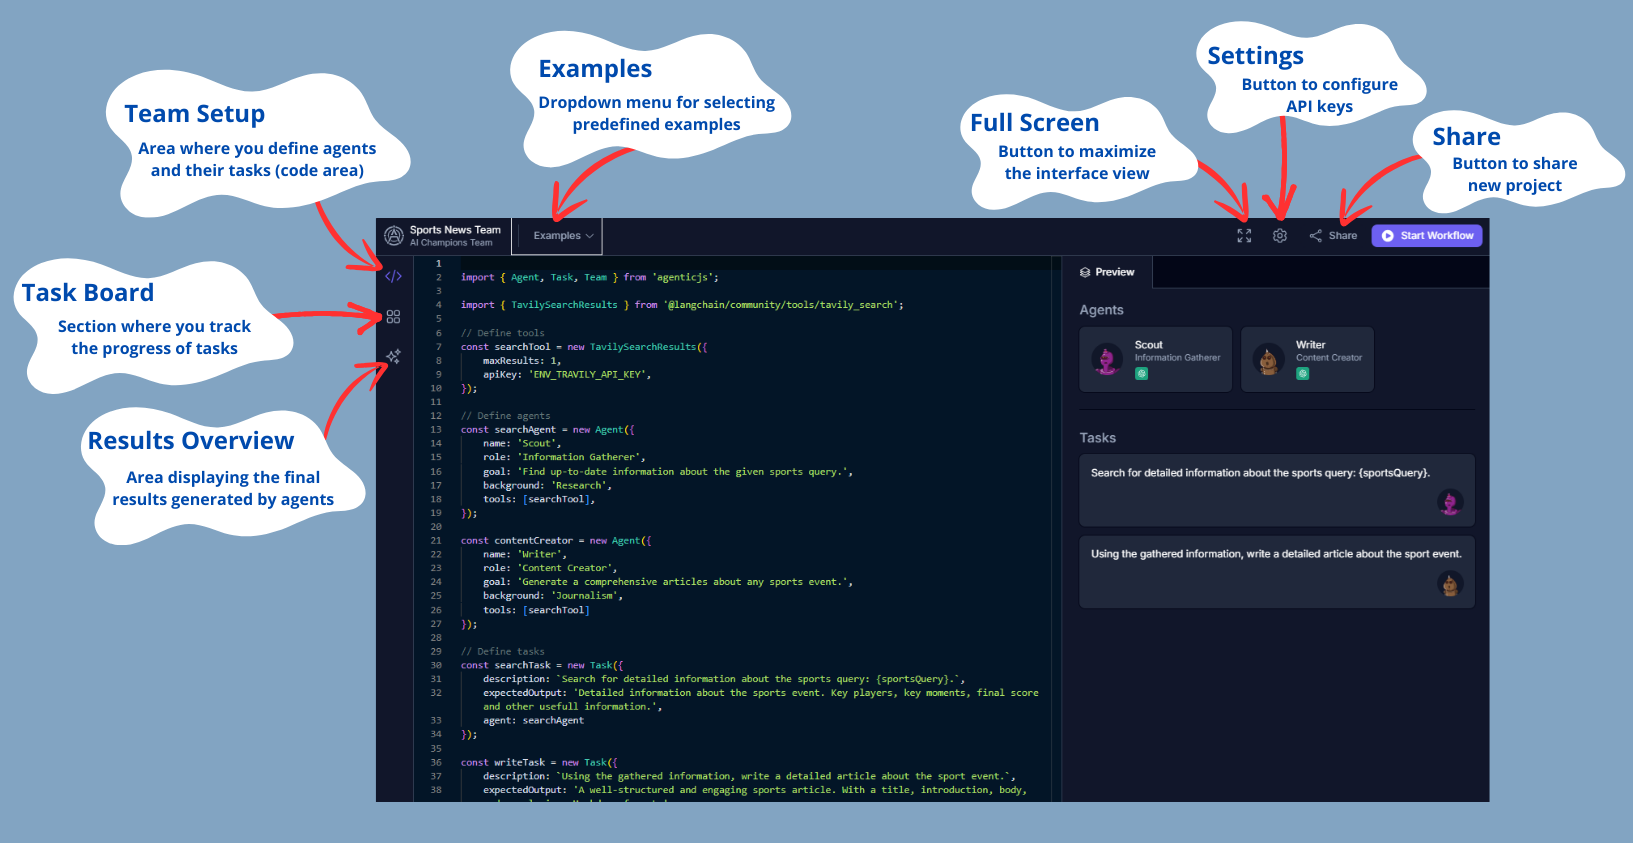
1. Team Setup
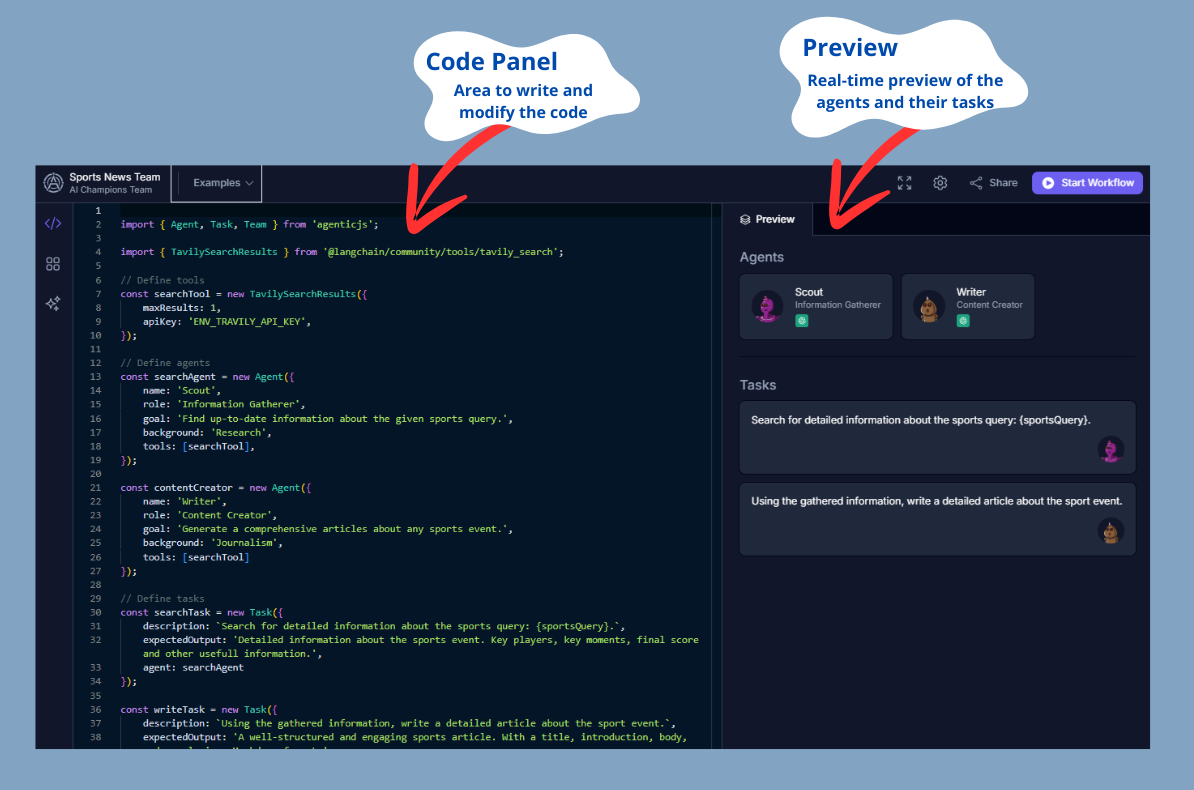
The "Team Setup" area is where you define the agents and their tasks. Although we won’t discuss code in this tutorial, it's important to know that this is where you configure the agents' behavior. By default, there will always be an example selected in this area.
- Code Panel: On the left, you can view and edit the code that defines the tools, agents, and tasks.
- Preview: On the right, you can see a real-time preview of the configured agents, including their names, roles, and the tasks they will perform.
At the top of the interface, you will find a dropdown menu called "Examples." Here you can select from several predefined examples to view and execute. These examples are ready to use and help you understand how multi-agent systems are configured.
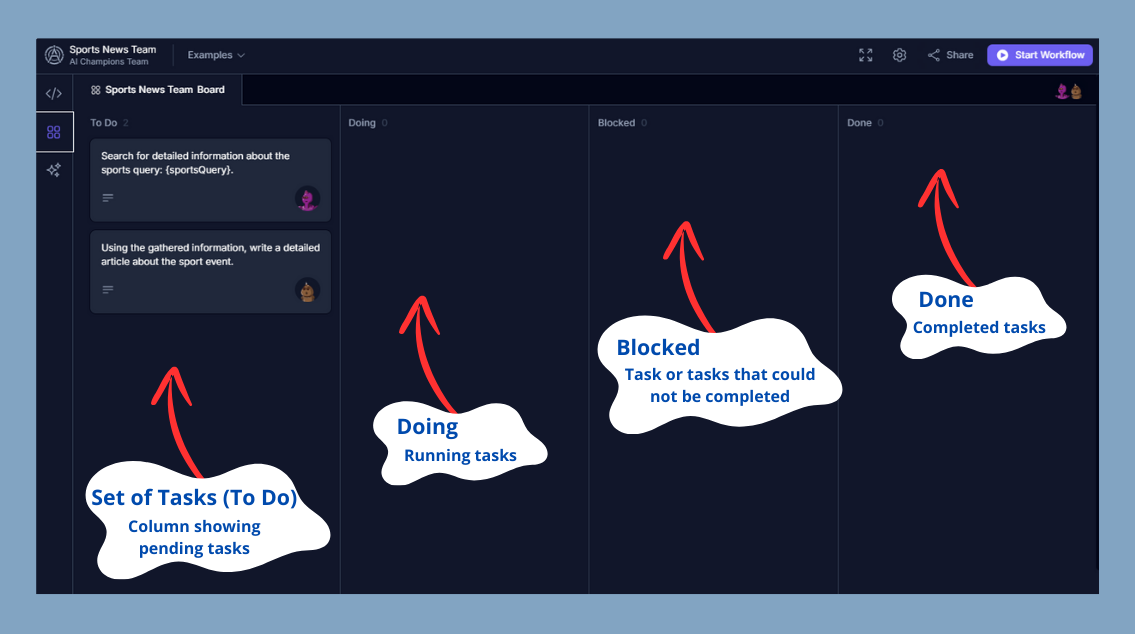
2. Task Board
The "Task Board" is a crucial section where you can track the progress of tasks assigned to the agents. It is like a Trello or Jira Kanban board but for AI Agents.
2.1. Task Panel
This panel organizes tasks into several columns
- To Do: Pending tasks.
- Doing: Tasks in progress.
- Blocked: Tasks that cannot proceed due to a blockage.
- Done: Completed tasks.
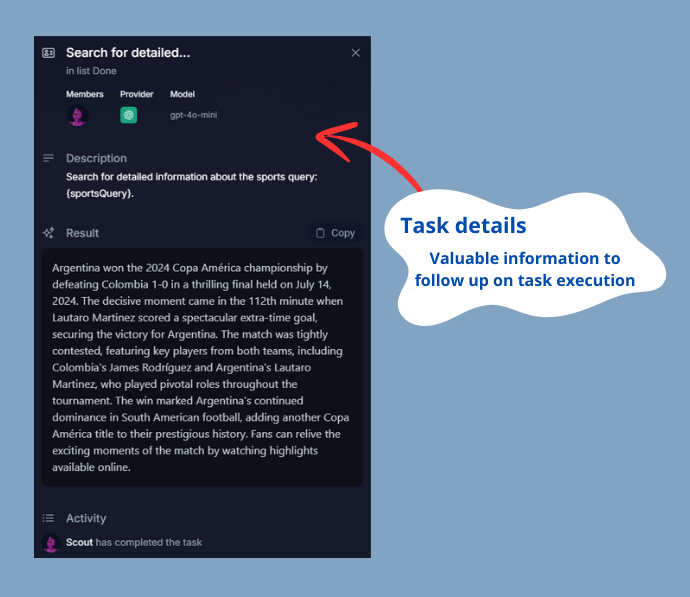
2.2. Task Details
For each task, you can see additional details such as its description, the activities carried out, the progress of execution, and partial results. The detailed view includes:
- Members: Shows the agents assigned to the task along with their roles, helping you understand who is responsible for each part of the task.
- Provider: Indicates the AI service provider being used, ensuring you know which backend is powering the task.
- Model: Displays the specific AI model utilized, giving insight into the type of processing being applied.
- Description: Provides a brief but detailed overview of what the task aims to achieve, ensuring clarity of purpose.
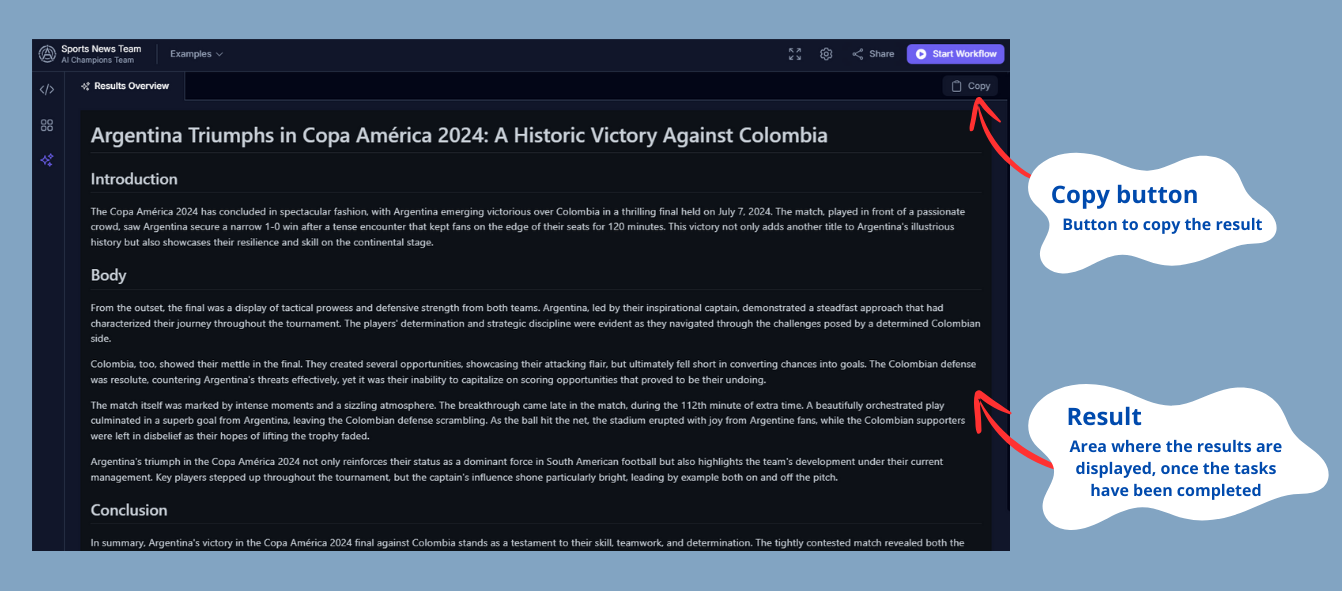
- Result: Shows the outcome generated by the agent, which can be copied for further use. This is where you see the final output based on the agent’s processing.
- Activity: Lists all the steps and actions taken by the agent during the task. This log includes statuses and updates, providing a comprehensive view of the task's progress and any issues encountered
2.3. General Activity
You can also see an overview of all agents' activities by clicking the "Activity" button.
3. Results Overview
The "Results Overview" area displays the final results generated by the agents once they complete their tasks.
- Results: Here you will find the reports generated or any other output produced by the agents. You can copy these results directly from the interface for further use.
Control Toolbar (Top Right)
Besides the main sections, the interface includes some important additional features:
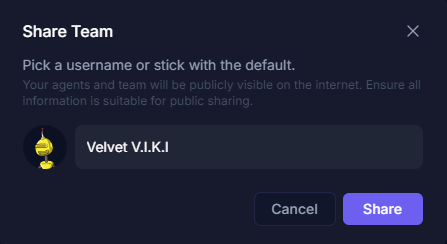
- Share Team
The "Share" button allows you to generate a link to share your current agent configuration with others. You can name your multi-agent system and easily share it.
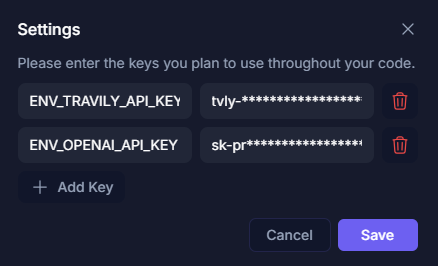
- API Keys Configuration
The settings button allows the user to enter their API Keys to change the AI model used. This provides flexibility to work with different AI service providers according to the project's needs.
- Full Screen
The full-screen button allows you to maximize the interface for a more comprehensive and detailed view of the playground. This is especially useful when working with complex configurations and needing more visual space.
- Start Workflow
This button initiates the execution of the tasks by the agents defined in your code.
Basic Interface Usage
- Create and Configure Agents and Their Tasks:
- Modify the default code or copy new code to create and configure agents. Observe how it reflects in real-time in the preview.
- Start the Workflow:
- Press "Start Workflow" to begin executing the tasks.
- Monitor Progress:
- Use the Task Board to track the progress of tasks and check specific details if needed.
- Review Results:
- Once tasks are completed, review the results in the "Results Overview" area.
- Share and Configure:
- Use the "Share" and "Settings" buttons to share your project and configure your API Keys.
Conclusion
The Agentic Kanban Board simplifies AI integration, enabling you to visualize, manage, and share AI agents with ease. Ideal for developers, project managers, and researchers, this tool facilitates efficient operation and collaboration without the need for complex setups. Enhance your projects by leveraging the power of AI with our user-friendly platform.
Is there something unclear or quirky in the docs? Maybe you have a suggestion or spotted an issue? Help us refine and enhance our documentation by submitting an issue on GitHub. We’re all ears!